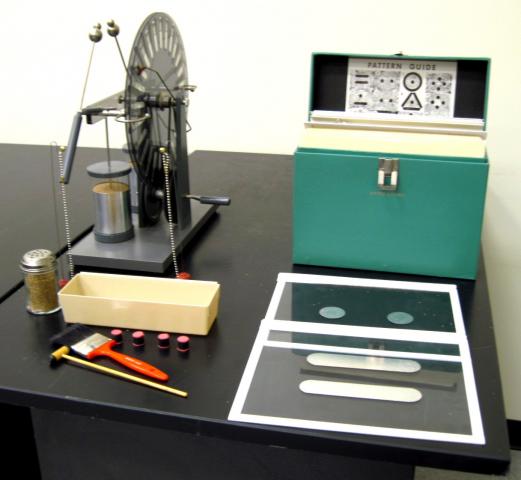
Electrostatic Lines-of-Force Kit
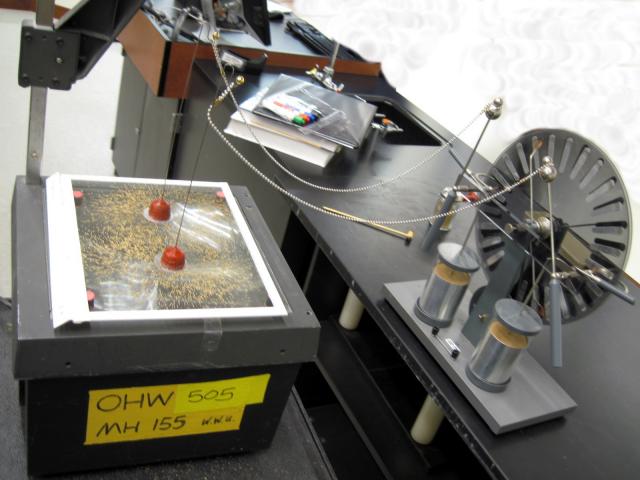
Practicing this before demonstrating before the class is highly recommended. It takes some time to figure out where everything needs to go, so you are not bumbling around in front of the class!
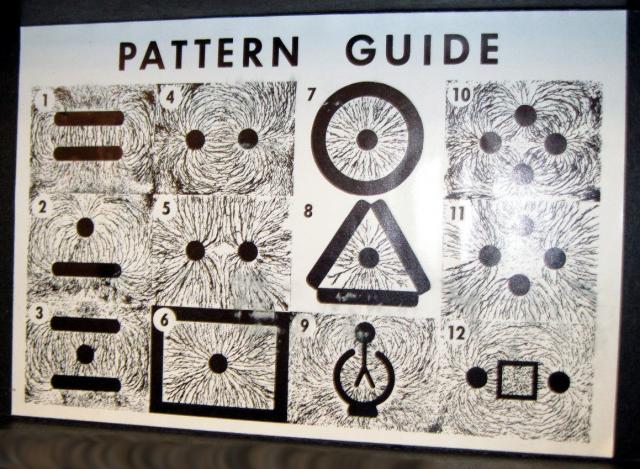
1. Place the desired plate on an overhead projector using the four small feet or the four large feet (which ever works best with your projector) to support the plate at the corners. To show patterns 5 or 11, lay the four aluminum strips along the edges of the plate and place the four remaining feet onto the strips at the corners of the plate; ground the strips by touching one of them with a finger, or otherwise.
2. Position the connecting posts on the electrodes. Two posts are needed for Patterns 1 – 9 and 12; four posts are needed for Patterns 10 and 11.
3. Connect the posts to a high-voltage source by means of the two long chains. Use the short chains for making connections between posts when you want to show Patterns 10 or 11.
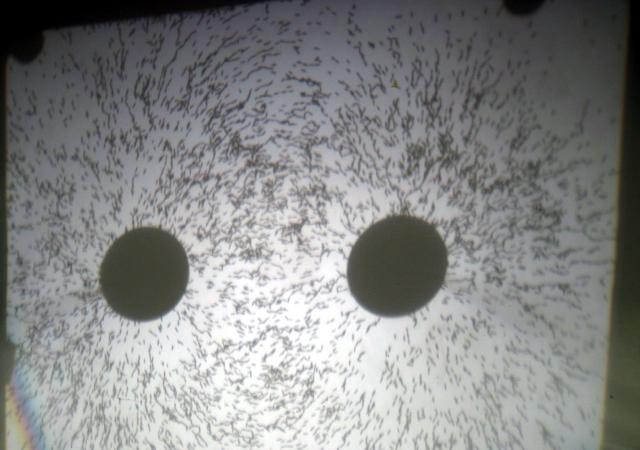
4. Sprinkle the grass seeds onto the plate.
5. Turn on the high voltage and lightly tap the plate with the mallet to facilitate the formation of the lines-of-force. Add more seeds where needed.
6. After demonstrating a lines-of-force pattern, remove the chains and connecting posts from the plate and sweep the seeds with the brush into the tray.
More Information